Ribbon stitchery
About the article
This is a digitised version of an article from The Cayman Compass's print archive. Occasionally, the digitisation process introduces transcription errors, or other problems.
See the article in its original context from April 1980.
Brought to you by
As ribbons, threads or fabric, silk has been valued since ancient times. The silk-making process was China's secret and subject of countless legends.
One legend tells of the Chinese Empress Hsi Ling Shih who first discovered the silkworm munching on mulberry leaves in her royal garden. Each day she watched the worm dispatch more leaves, grow fat, and eventually, spin itself into a cocoon. She assumed the creature was dead until, several days later, it exited from the cocoon as a moth. Astonished, she carried the empty cocoon to the bath and accidentally dropped it. In the warm bathwaters, the cocoon softened and unwound into lustrous fibers ... silk fibers that are still the basis
B.
of the world's most precious fabrics.
As ribbons, in real silk or silky synthetic, all the classic embroidery stitches are easy to do. In fact, since embroidery ribbons are one-eighth-inch wide, few stitches are required to fill an area.
Even if you're a beginner embroiderer, you're sure to enjoy the results. Here are directions for ribbon embroidery: MATERIALS: Silk or soft, synthetic, silklike ribbons (see note below) approximately one-eighth-inch wide, embroidery hoop (optional), scissors, long-eyed needle, iron-on transfer pattern, dressmaker's carbon paper, or tailor's chalk. STARTING: 1. Draw your design on fabric. Either use an iron-on pattern, trace any design with carbon paper or draw freehand with tailor's chalk. 2. Place fabric in embroidery hoop. 3. Cut ribbon diagonally. Thread diagonal end through needle. 4. Slid needle through ribbon, about one-half inch from diagonal end. This keeps ribbon from sliding back out of the needle. 5. Knot other end of ribbon.
RULES: 1. Keep ribbon flat as you embroider. To help, slide one finger under the ribbon as you stitch. Any twists in the ribbon will then be pulled through the fabric. 2. Use stitches described below. 3. End off by stitching through ribbons on wrong side of fabric.
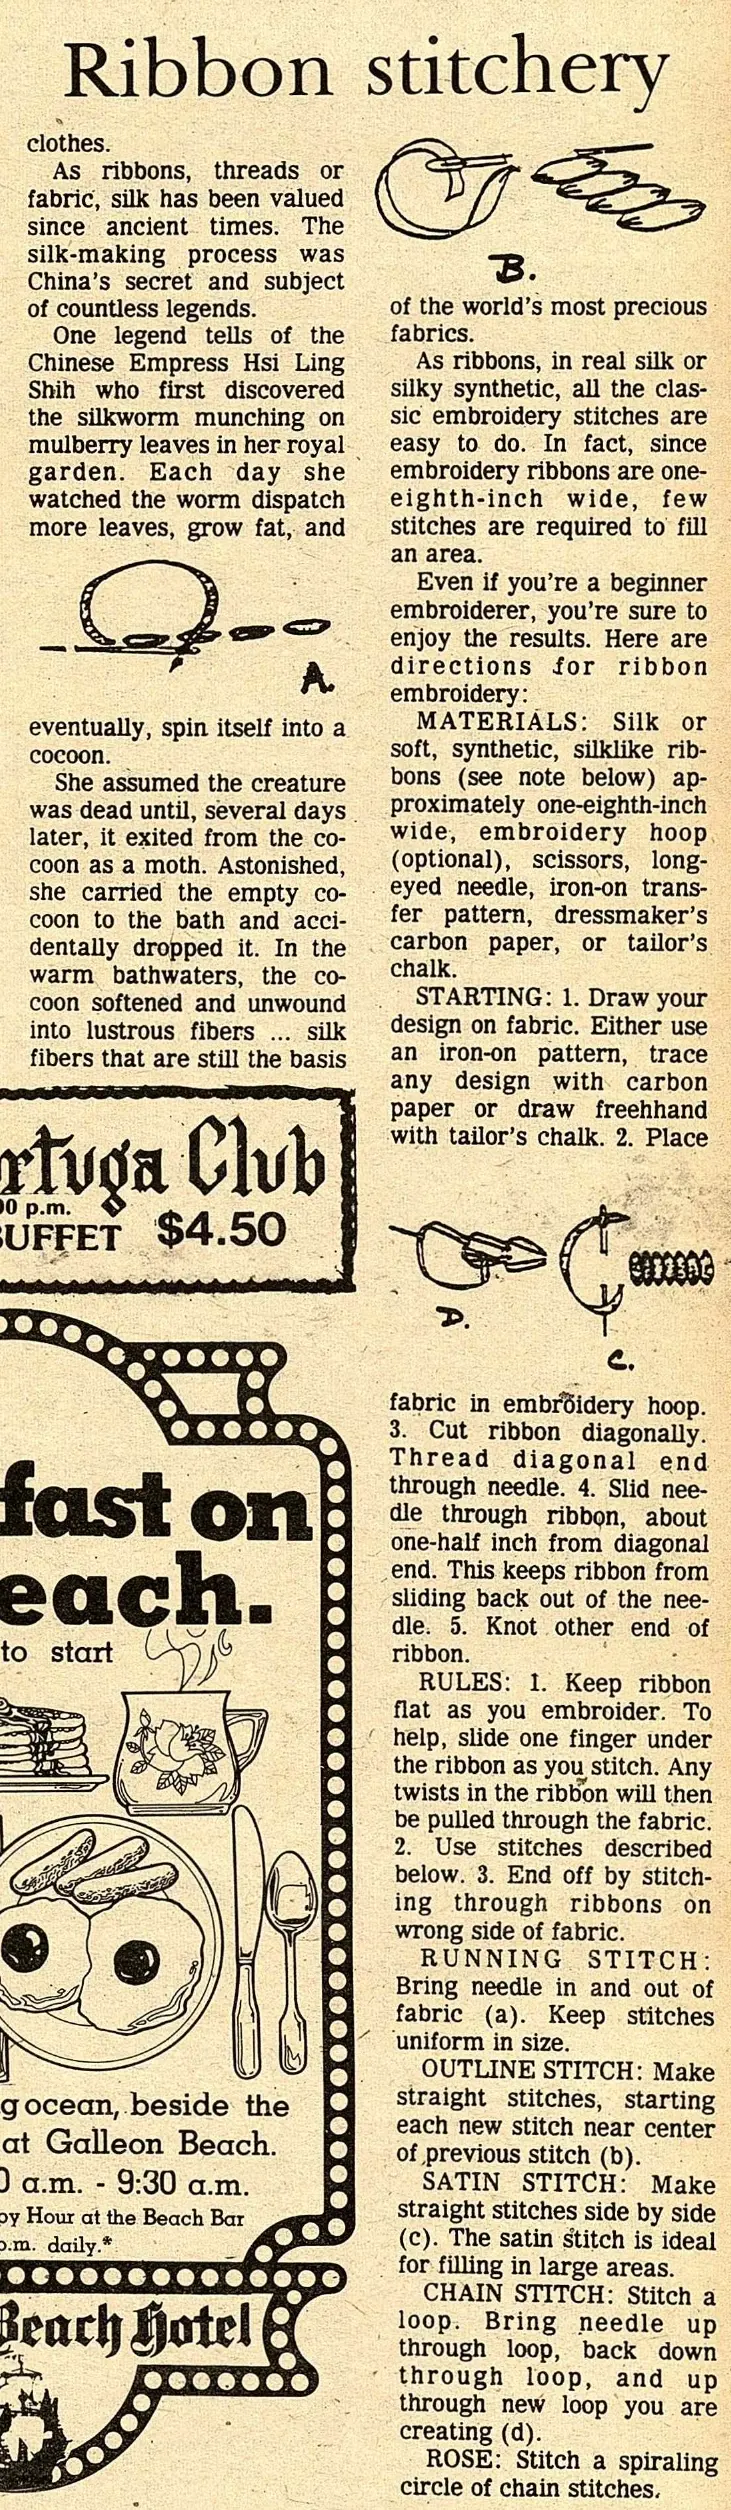
RUNNING STITCH: Bring needle in and out of fabric (a). Keep stitches uniform in size.
OUTLINE STITCH: Make straight stitches, starting each new stitch near center of previous stitch (b).
SATIN STITCH: Make straight stitches side by side (c). The satin stitch is ideal for filling in large areas.
CHAIN STITCH: Stitch a loop. Bring needle up through loop, back down through loop, and up through new loop you are creating (d).
ROSE: Stitch a spiraling circle of chain stitches.